Cor-Form Product Instructions
If you’re looking for a commercial construction product to assist in the infill of unwanted core holes, Cor-Form is exactly what you need. Our team has prepared detailed instructions for you to follow for the safe and efficient install of Cor-Form.
Installation Instructions

Step 1
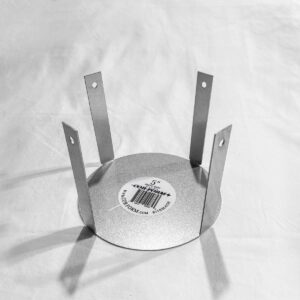
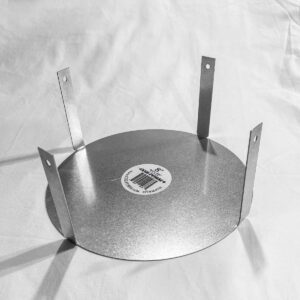
The Cor-Form measurement is based on the size of the hole intended to be filled. In other words, a 4″ Cor-Form is intended to be used to infill a 4″ hole in the floor. The dimension of the center circle diameter of the Cor-Form will measure 1/8″ less than the actual diameter of the hole. This allows for an easier installation.
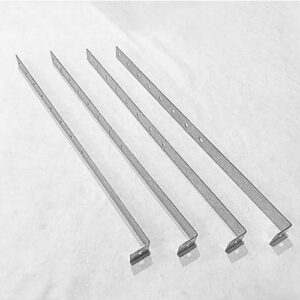
Step 2
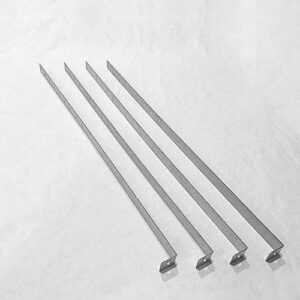
The Cor-Form will be flat and the straps will need to be bent in order to fit correctly in the hole. Each strap should be bent, in the same direction, to about 80 degrees from its original location. By only bending to 80 degrees, the straps will put pressure on the sides of the hole in the floor and hold it in place during installation.
")

")
Step 3
Depending on how tight the bend is at the outside diameter of the circle, you may need to bend the strap all the way over to about 170 degrees from its original position and then bend back to the intended target of 80 degrees from original location. By doing this, you will create a tighter bend at the connection to the circle allowing for easier installation. You can also achieve a tight bend by using pliers or some other tool to help bend the strap.
Step 4
Once the Cor-Form straps are bent into their intended position, you can begin placing the Cor-Form into the hole intended to be filled. Hold two of the opposite straps and push the Cor-Form down into the hole with the sheet metal circle ending up at the bottom of the hole with the top of the straps ending slightly below the finish elevation of the floor.

")
")
Step 5
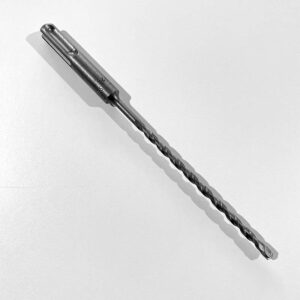
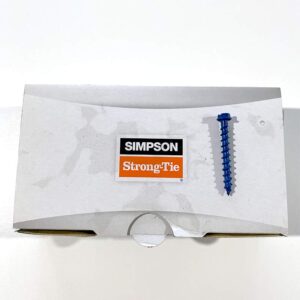
Once in place, it is time to fasten the Cor-Form to the sides of the hole. At the top of each strap, there is a hole provided. Drill a hole in the concrete at each of these locations into the side of the hole. The size of the hole should be coordinated with the size of the concrete fastener being used. There are a number of options for concrete anchors/fasteners, use what you are most comfortable installing.
Once the concrete anchors are in place, the Cor-Form installation is complete, the following should be taken into consideration during installation:
- Once installation of Cor-Form is complete, it is recommended that a bead of fire rated caulking is installed. The fire stopping should be installed at the outside perimeter of the center circle of the Cor-Form, sealing the gap between the sheet metal base and the side of the hole. Sealing this location will help create the fire separation between floors. It will also keep any liquid from a wet mix of concrete or another fluid cementitious material from leaking past the Cor-Form.
- It is a good practice to install rods/rebar in the side of the hole, once the Cor-Form is installed, to assist in the shear strength of the core infill. Cor-Form is not a structural component of this assembly; it is intended to be a form to hold the concrete while it cures in place.
- It is recommended that you use a non-shrink product in an effort to reduce the possibility of separation between the existing slab and the product used to fill the hole.
At this point, the concrete product of your choice can be installed in the prepared hole. Read the instructions of the concrete product you are using to determine the length of time it takes before allowing foot traffic, floor prep material, flooring, etc.