Guide to Sustainable Core Hole Repair
This guide provides a comprehensive framework for mastering the art and science of core hole repair. It’ll help you move beyond superficial patching and adopt sustainable remediation methodologies that ensure long-term structural integrity and safety. By following these steps, you’ll learn to properly assess damage, select the right materials, and apply them with precision. This knowledge will empower you to execute repairs that are not only effective but also cost-efficient and environmentally responsible, transforming a common construction challenge into an opportunity for excellence. The global concrete restoration market was valued at USD 17.33 billion in 2023, underscoring the critical and growing demand for durable repair solutions.
Introduction: Beyond the Patch – The Imperative of Sustainable Core Hole Remediation
The Ubiquitous Challenge of Core Holes in Concrete Structures
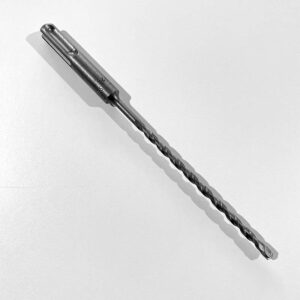
Core holes are a necessary and frequent byproduct of modern construction. Created by diamond-tipped drills, these cylindrical voids are essential for routing plumbing, electrical conduits, HVAC lines, and communication cables through concrete slabs and walls. They are also drilled for material testing and the installation of anchoring systems. While indispensable, these penetrations fundamentally compromise the structural matrix and protective envelope of the concrete element. Each hole, regardless of its size, becomes a potential point of failure if not addressed with meticulous care. Left unrepaired or poorly patched, these seemingly minor voids can lead to significant issues, including moisture ingress, pest infestation, compromised fire ratings, and a reduction in the overall load-bearing capacity and shear strength of the concrete surfaces.
Why “Sustainable Remediation” Trumps Quick-Fix Repairs
The concept of “sustainable remediation” elevates core hole repair from a simple patching task to a strategic engineering process. Unlike a quick-fix approach that prioritizes immediate visual closure, sustainable remediation focuses on restoring the concrete’s original performance characteristics—or even enhancing them. This methodology emphasizes long-term durability, structural integrity, and environmental responsibility. A sustainable repair integrates seamlessly with the parent concrete, withstands service loads and environmental stressors, and minimizes the need for future rework. By choosing durable materials and proven techniques, you can extend the service life of the structure, conserve resources, and reduce the lifecycle costs associated with repeated maintenance and failure, aligning with a more responsible approach to construction and asset management.
The Hidden Costs of “Quick Fixes”: Why Superficial Repairs Fail
Common Pitfalls of Product-Centric, Speed-Focused Approaches
In the fast-paced world of construction, the allure of speed is powerful. This often leads to a product-centric approach where a simple “pour and go” solution, like a basic concrete filler, is chosen without regard for the specific demands of the application. The primary pitfall of this mentality is the failure to address the underlying mechanics of the repair. Simply filling the void with a generic cement patching material neglects crucial factors like bond strength, shrinkage, and thermal expansion compatibility. Speed-focused repairs often bypass essential floor prep, resulting in a weak bond between the new material and the existing concrete. This creates a repair that is merely a plug, not an integrated structural component, destined to fail under stress.
Understanding Failure Modes: Where Simple Patches Fall Short
Superficial patches fail in predictable ways. The most common failure mode is delamination, where the patch separates from the parent concrete due to poor adhesion. This can be caused by inadequate surface preparation, contaminants like dust or oil, or the use of a material with high shrinkage. Another frequent failure is cracking within the patch itself, often because the chosen material lacks the necessary compressive or flexural strength to handle service loads or thermal cycling. Water intrusion is another critical failure, as a non-bonded patch creates a direct channel for moisture, leading to rebar corrosion and freeze-thaw damage within the slab. Ultimately, these simple patches fail to restore fire ratings and do not transfer shear loads effectively across the opening, creating hidden structural and safety liabilities.
Understanding Core Hole Dynamics: Root Causes and Failure Mechanisms
Why Core Holes Degrade: Beyond Initial Drilling
The moment a core hole is drilled, it becomes a point of weakness. The drilling process itself can create micro-fractures around the perimeter of the hole, compromising the immediate concrete matrix. Over time, these vulnerabilities are exacerbated by several factors. Unrepaired holes are subject to edge spalling and chipping from foot traffic, rolling loads, or equipment movement. They act as collection points for water, chemicals, and debris, which can accelerate the degradation of the surrounding concrete and corrode any exposed steel reinforcement. In slabs-on-grade, moisture can migrate upward through the hole via capillary action. In elevated slabs, gravity pulls everything downward. This constant exposure to physical and chemical stressors means that an unaddressed core hole is not a static void but a progressively worsening defect.
The Science of Inadequate Repair: How Improper Methods Worsen the Problem
An improper repair can be more detrimental than no repair at all. When a patch fails, it often takes a piece of the parent concrete with it, enlarging the damaged area and making the subsequent repair more complex and costly. Using a material that is significantly stronger or stiffer than the surrounding concrete can create stress concentrations at the bond line, leading to cracking in the weaker parent material. Conversely, a weak patch material will simply crumble under load. Furthermore, if a repair traps moisture against reinforcing steel, it can accelerate corrosion dramatically, creating a hidden and dangerous structural problem. This underscores why the choice of floor repair products must be a carefully considered decision based on engineering principles, not convenience.
Phase 1: Comprehensive Assessment and Preparation for Sustainable Repair
Detailed Site Inspection and Damage Diagnosis
The first step in any successful core hole repair is a thorough assessment. This is not a cursory glance but a detailed investigation. Begin by measuring the precise diameter and depth of the hole. Visually inspect the internal surfaces for any signs of honeycombing, exposed aggregate, or rebar. Note the condition of the edges—are they sharp and stable, or are they spalled and crumbling? Check for the presence of contaminants such as oil, grease, paint, or old sealant residues that could inhibit bonding. It is also crucial to understand the service environment. Is the area subject to heavy loads, chemical exposure, or significant temperature fluctuations? This diagnostic phase informs every subsequent decision, from material selection to application technique, ensuring the chosen solution is appropriate for the specific conditions.
Precision Preparation: The Foundation for Durability
Preparation is arguably the most critical phase of the entire repair process. A durable repair is built on a strong bond, and a strong bond can only be achieved on a clean, sound substrate. The objective of floor prep is to create a profile that the repair material can mechanically lock onto.
Cleaning: Begin by removing all loose debris, dust, and contaminants from within the hole and the surrounding surface. A wire brush and a vacuum cleaner are essential tools. For stubborn contaminants like oil, a suitable degreaser may be necessary.
Sounding and Chipping: Gently tap the concrete around the hole’s perimeter with a hammer to identify any delaminated or unsound material. This weak concrete must be chipped away until you reach a solid substrate.
Surface Profiling: The smooth sides left by a core drill are poor surfaces for bonding. The goal is to create a rougher profile. This can be achieved with a small chipping hammer or a drill equipped with a carbide bit drill to roughen the interior walls, creating a better mechanical key for the new material.
Pre-Wetting (for Cementitious Materials): For most cement-based patching compounds, the prepared concrete should be brought to a saturated, surface-dry (SSD) condition. This involves wetting the hole to prevent the dry parent concrete from prematurely wicking moisture out of the repair mortar, which would weaken it and compromise the bond.
Phase 2: Strategic Material Selection for Long-Term Performance
Choosing the Right Repair Material: Beyond Basic Fillers
Selecting the right repair material is a balance of performance, compatibility, and application requirements. A simple concrete filler is rarely the best choice. Look for engineered industrial concrete repair products designed for this purpose. Key properties to consider include:
Compressive Strength: The repair material should ideally match or slightly exceed the compressive strength of the parent concrete.
Shrinkage: Low-shrinkage or non-shrink formulations are critical. Shrinkage creates tensile stresses at the bond line and can lead to delamination and cracking.
Bond Strength: The material must demonstrate high bond strength to properly prepared concrete.
Workability and Curing Time: The material should have a working time suitable for the project scale and cure quickly enough to allow a timely return to service.
The market for these materials is vast; the concrete repair mortars market was valued at $2.7 billion in 2020 and is projected to reach $5.3 billion by 2032, reflecting the diversity of available solutions. For most applications, a high-quality, pre-packaged, non-shrink cement patching material is an excellent choice.
Reinforcement and Structural Enhancement Materials
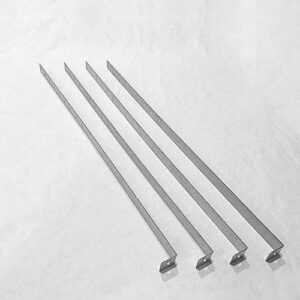
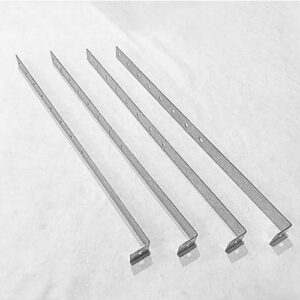
For core holes in structurally significant locations or those subject to high shear loads, simply filling the void is insufficient. The repair must be reinforced to effectively transfer loads across the opening. A common and highly effective method is to install a piece of rebar or a threaded aluminum rod vertically through the center of the repair. This reinforcement should be properly anchored into the concrete below or tied into the existing rebar mat if possible. In larger diameter repairs, incorporating steel mesh reinforcement within the patching material can further enhance its tensile and flexural strength, creating a truly robust and integrated structural repair.
Essential Formwork and Containment Solutions
To place flowable or plastic repair materials in a core hole, a bottom form is required. Traditional methods involving a plywood board and shoring from the floor below are labor-intensive, disruptive, and costly. This is where innovative, single-sided solutions have revolutionized the process.
Sheet Metal Forms: Custom-fabricated sheet metal forms can be used, but they often require mechanical fastening and can be cumbersome.
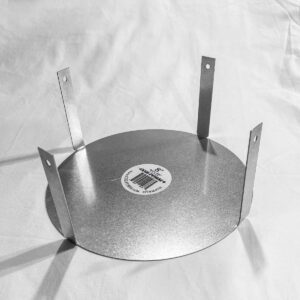
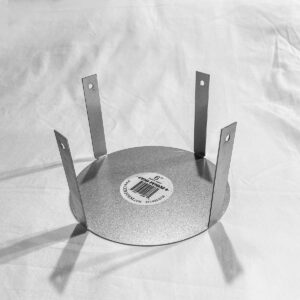
Proprietary Systems: Advanced systems like the ADM Core Hole Repair Kit and the Cor form 5 inch core hole filler offer engineered, off-the-shelf solutions. The Cor form 5 inch, for example, is a device made from galvanized steel of a specific Sheetmetal Gauge that can be inserted from the top. Its integrated expansion flaps are deployed by pulling straps, creating a secure, watertight seal at the bottom of the hole in minutes. This eliminates the need to access the floor below, drastically reducing labor time and improving site safety. These systems act as a permanent, leave-in-place form for the chosen Core Hole Filler.
Phase 3: Precision Application and Curing for Optimal Results
Best Practices for Mixing and Placement
The performance of even the best repair material can be compromised by improper mixing and placement. Always follow the manufacturer’s instructions to the letter.
- Measure Precisely: Use clean measuring containers for both the powder and the liquid (typically water). Do not estimate quantities. Adding too much water will significantly reduce the material’s strength and increase shrinkage.
- Mix Thoroughly: Use a low-speed drill with a paddle mixer for a minimum of 2-3 minutes, or as directed. Mix until a homogenous, lump-free consistency is achieved. Avoid whipping air into the mix.
- Place Promptly: Place the mixed material into the prepared hole immediately. Work the material into the corners and edges to ensure there are no voids. If reinforcement is present, ensure the material is consolidated around it.
- Finish Appropriately: Screed the surface of the patch level with the surrounding concrete floor. A slight overfill may be needed for some materials to account for any minimal shrinkage, which can then be ground down after curing.
Advanced Application Methodologies and Systems
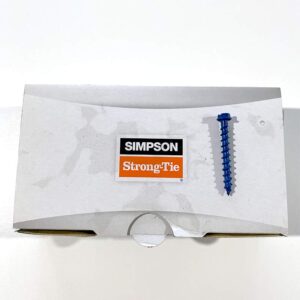
The use of systems like the Cor form 5 inch core hole filler streamlines the application process. Once the form is secured in place, a bead of fire-rated caulk is often applied around its top perimeter to ensure fire- and smoke-sealing integrity. The chosen concrete patching compound is then simply poured into the form from the top. The form contains the material perfectly, ensuring a clean and efficient fill. For repairs requiring enhanced structural capacity, a concrete anchor can be set into the bottom of the hole before the form is placed, allowing a threaded aluminum rod to be secured vertically, ready to be encapsulated by the repair material. The hand-applied segment is dominant in the market, holding the largest revenue share of 53.2% in 2024 due to the precision required for such specialized repairs.
The Critical Role of Proper Curing
Curing is the chemical process of hydration that gives cementitious materials their strength. If a repair dries out too quickly, this process halts prematurely, resulting in a weak, porous, and crack-prone patch. Proper curing is non-negotiable for a durable repair.
- Moist Curing: This is the most effective method. As soon as the repair material has reached its initial set, cover it with wet burlap or plastic coverings, keeping it continuously moist for the period recommended by the manufacturer (typically 3 to 7 days).
- Curing Compounds: Alternatively, a liquid membrane-forming curing compound can be sprayed onto the surface. This creates a film that traps moisture inside the repair, allowing hydration to proceed. This is often a more practical solution on busy job sites. Neglecting this final, critical step can undo all the meticulous preparation and application work that came before it.
Ensuring Long-Term Sustainability and Performance Monitoring
Post-Repair Inspection and Quality Assurance
Once the repair has fully cured, a final inspection is necessary to verify its quality. The patch should be free of any cracks, voids, or signs of delamination. Check for soundness by tapping the surface with a hammer or a steel rod; it should produce a solid, ringing sound, not a hollow thud. The surface should be level with the surrounding floor, presenting no trip hazards. For critical structural repairs, more advanced non-destructive testing methods may be warranted. Proper documentation of the location, date, materials used, and preparation methods for each repair creates a valuable record for facility management and future maintenance planning.
The Environmental and Economic Dividends of Sustainable Remediation
Adopting a sustainable remediation strategy yields significant long-term benefits. Economically, a durable repair eliminates the compounding costs of rework, which include not only direct labor and material expenses but also the indirect costs of operational downtime and site disruption. Environmentally, a long-lasting repair conserves resources by reducing the consumption of new materials over the structure’s lifespan. This aligns with broader industry goals, as the growing Global Green Concrete Market, valued at USD 36.5 billion in 2024, demonstrates a clear shift toward more sustainable construction materials and practices. By doing the job right the first time, you minimize waste and reduce the overall environmental footprint of building maintenance.
Preventative Measures and Future-Proofing
Future-proofing involves anticipating future needs and making provisions during the repair process. If a core hole may be needed again for future utilities, consider installing a sleeve or conduit within the repair rather than filling it solid. This makes future access non-destructive. For areas with a high potential for new core holes, reinforcing the repair with additional steel can help distribute future drilling stresses. Maintaining a clean and well-sealed concrete surface through regular maintenance prevents contaminants from penetrating the slab, making future floor prep easier and more effective should new repairs be needed.
Conclusion: The Value of Methodical and Sustainable Core Hole Repair
Reaffirming the Shift from Patching to Remediation
The journey through this guide highlights a crucial paradigm shift: moving from the simple act of patching to the comprehensive process of remediation. A patch is a temporary cover-up; remediation is a permanent restoration of function, strength, and safety. This methodical approach—encompassing detailed assessment, meticulous preparation, strategic material selection, and precise application—is the only way to guarantee a repair that contributes positively to the structure’s longevity. The growing foundation repair services market, projected to rise from USD 2.9 billion in 2025 to USD 4.4 billion by 2035, reflects the industry’s increasing recognition of the value of professional, long-term structural solutions over inadequate quick fixes.
Empowering Professionals for Durable Concrete Solutions
By embracing the principles of sustainable remediation, construction and maintenance professionals are empowered to deliver superior outcomes. They can confidently address the ubiquitous challenge of core holes, transforming them from liabilities into non-issues. The knowledge of advanced materials and innovative systems, such as single-sided forms, equips them with the tools to perform these repairs more efficiently, safely, and cost-effectively than ever before. This expertise not only enhances the value of the structures they work on but also elevates their professional standing, marking them as practitioners committed to quality and long-term performance.
What’s Next?
You have now gained a comprehensive understanding of the critical methodologies for sustainable core hole repair. You’ve learned to diagnose the problem, recognize the failings of quick fixes, and follow a structured, three-phase process for assessment, material selection, and application that ensures durable, high-quality results. The key takeaway is that success lies in treating each core hole as a mini-engineering project deserving of careful planning and execution.
Your next steps are to:
- Assess Your Current Projects: Review any upcoming or ongoing projects that involve core drilling. Apply the assessment principles from Phase 1 to accurately diagnose the requirements for each repair.
- Evaluate Your Material and System Choices: Compare your current go-to floor repair products against the criteria for sustainable remediation. Investigate modern systems like the ADM Core Hole Repair Kit or Cor form 5 inch core hole filler to see how they can improve your efficiency and results.
- Implement Best Practices: Immediately integrate the best practices for floor prep, mixing, placement, and curing into your standard operating procedures.
- Seek Expert Consultation: For complex or high-volume repair needs, don’t hesitate to reach out to manufacturers or suppliers of industrial concrete repair products to get tailored advice or request quote for specialized solutions.